 VectoDesk
Before you start
Use a current desktop browser (Chrome/Edge 91+, Firefox 89+ or Safari 16.4+) over HTTPS or localhost. Have the SVG file ready on disk. If the file references external images or a font that is not installed, expect a fallback — embedding those resources before you start avoids surprises.
The first editor load downloads the WebAssembly engine in five cached parts. That is a one-time cost per version; later visits reuse the cache.
A practical editing workflow
- Open the artwork. In the editor, drag the SVG onto the canvas. The document tab shows the file name and zoom, and the artboard renders the artwork as separate vector objects.
- Select what changes. Click an object to see it in the Properties panel; use the Layers panel when objects overlap. For a path, switch to Direct Selection to reach individual anchors and handles.
- Make the edit, then look at the whole artboard. Set fill, stroke, position and size numerically rather than by eye. Zoom back out to confirm nothing outside the artboard shifted.
- Export deliberately. Choose the output format and its settings, then save the file. Do not rely on the tab staying open — there is no cloud save.
Common edits and where to find them
| Task | Where | Note |
|---|---|---|
| Change a fill or stroke | Properties › Appearance | Colour swatch, stroke weight and appearance effects stay with the selected object. |
| Reshape a curve | Pen / Direct Selection tools | Anchors are shown as square points with round handle endpoints. |
| Position and size precisely | Properties › Transform | X, Y, W and H are numeric fields; we verified them updating after drawing a rectangle. |
| Reorder overlapping art | Layers panel | Each object is a row; visibility and locking are per layer. |
| Add new geometry | Left toolbar | Rectangle, ellipse, pen and the rest of the shape tools draw on the artboard. |
Exporting for the web
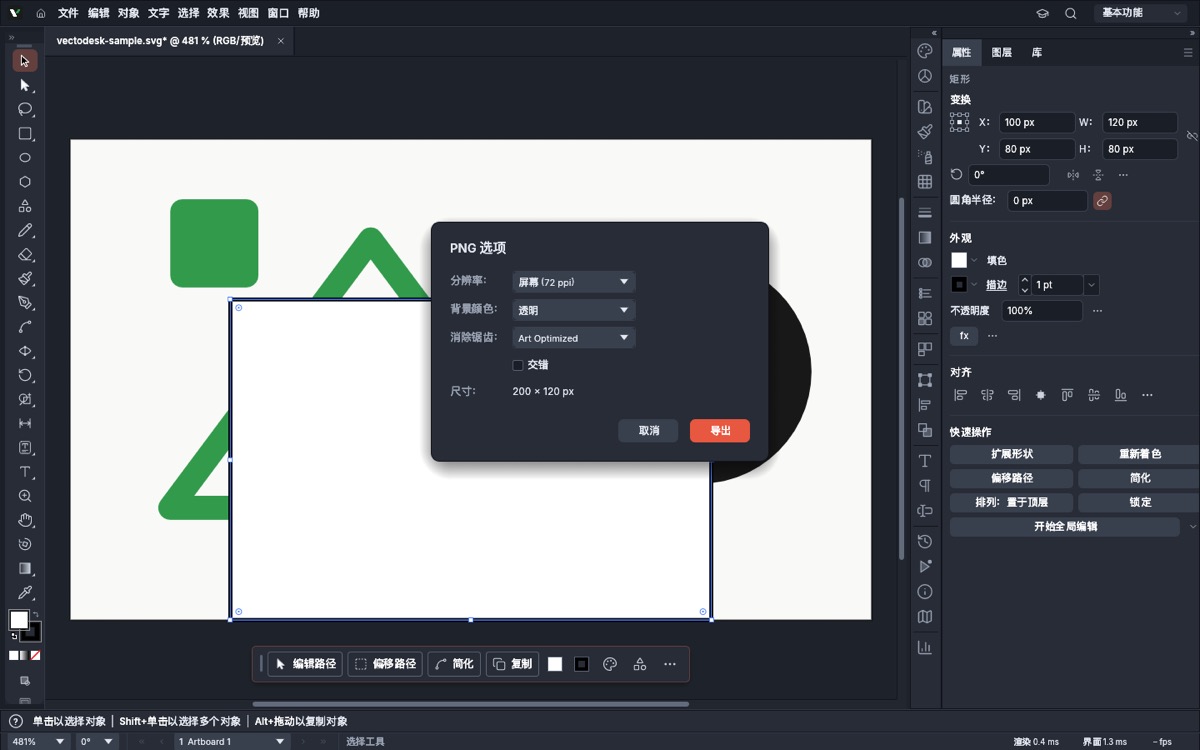
For a raster asset, use File › Export › Export as PNG…. The dialog we verified exposes resolution (Screen / 72 ppi by default), background colour (including transparent), anti-aliasing (Art Optimized), an interlacing toggle and the resulting pixel size. A 200 × 120 SVG artboard produced a valid 200 × 120 RGBA PNG with the PNG signature intact.
For a vector asset, File › Export › Export as SVG… keeps the file scalable; PDF, JPEG and WebP paths are available from the same File menu when a delivery pipeline asks for them. The exact dialog steps are in the PNG export guide.
Known constraints
- Type objects depend on available fonts; a missing family falls back instead of being embedded automatically.
- WebGPU is preferred and WebGL2 is the automatic fallback. If a driver misbehaves,
?webglforces WebGL2 and?cpuforces the slower CPU path. - The download is a normal browser download. If nothing arrives, check that the browser allows downloads from the site and that the export dialog was confirmed.
- The editor's internal interface still uses the upstream application's wording and icon in a few places; those are compiled into the WebAssembly binary and are documented in the open-source notices.
Looking for the tool overview instead? The Free Online SVG Editor page covers what the workspace is, which formats it handles and when a desktop application is a better fit.