 VectoDesk
Start with an open document
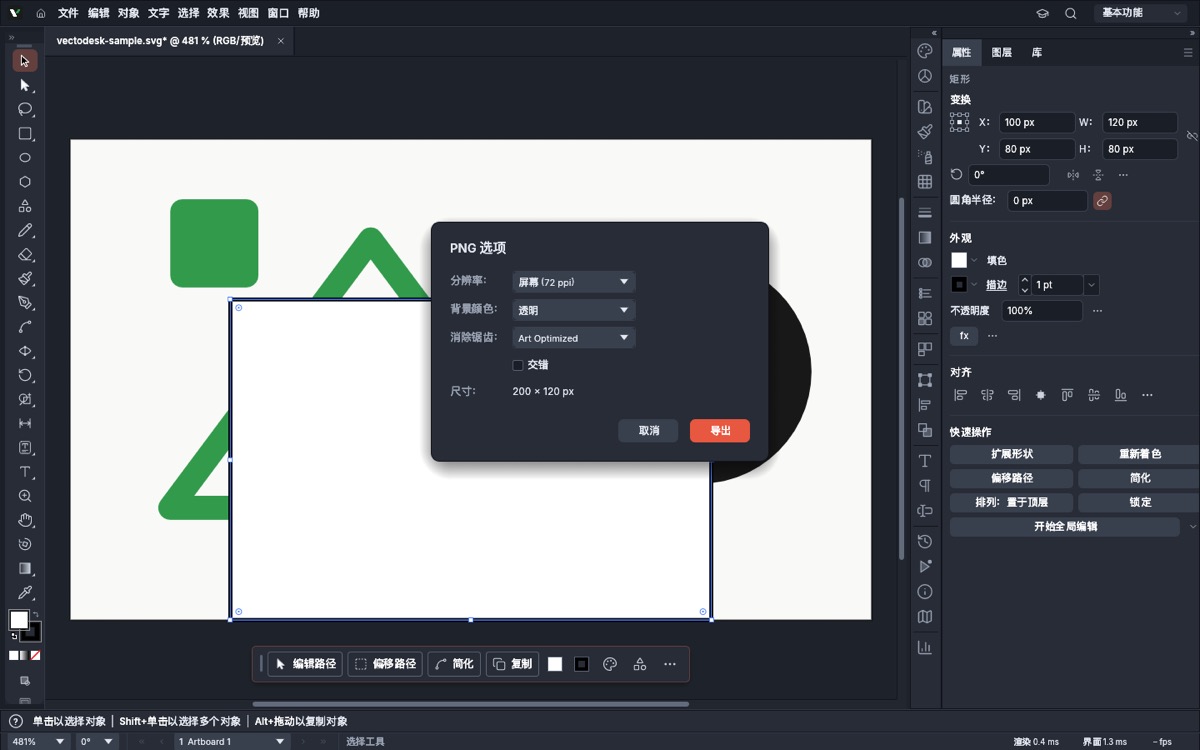
Export needs an active document. Create one with File › New or follow Open and edit an SVG first. In our verification run we imported a 200 × 120 SVG, which set the artboard size used by the export dialog.
Steps
- Open the File menu in the top menu bar.
- Hover Export near the bottom of the menu to reveal its submenu.
- Choose "Export as PNG…". The submenu also contains Export for Screens, Export As…, Export as SVG… and the legacy Save for Web option.
- Review the PNG options dialog. In our build it offered: resolution (Screen / 72 ppi), background colour (including Transparent), anti-aliasing (Art Optimized), an Interlaced checkbox, and the resulting pixel size — 200 × 120 px for our artboard.
- Click Export. The browser downloads the
.pngfile using the document name. Confirm the download if your browser prompts you.
Verification result
We captured the exported bytes and checked them outside the browser:
| Check | Result |
|---|---|
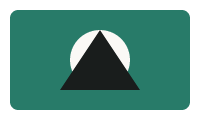
| Output name | vectodesk-sample.png |
| File size | 1,696 bytes |
| PNG signature | Valid (89 50 4E 47 0D 0A 1A 0A) |
| Dimensions | 200 × 120 px, read from the IHDR chunk |
| Colour format | 8-bit RGBA, non-interlaced |
| Console errors | None |
You can download the exact exported sample PNG to compare with your own result.
Other export paths
- Export as SVG… keeps the artwork scalable for the web.
- Export for Screens and Export As… cover multiple sizes or a different target format.
- Save as PDF, JPEG and WebP paths are available from the same File menu.
Troubleshooting
- No file arrives: check that the browser allows downloads from this site, and that you pressed Export in the dialog rather than Cancel.
- Wrong pixel size: the dialog reports the size derived from the artboard and resolution. Change the document or artboard dimensions before exporting.
- Opaque background: set Background colour to Transparent in the PNG options; the exported file is RGBA, so transparency is preserved.
- Export is greyed out: open or create a document first — there is nothing to export from the welcome screen.
Export your own artwork
Open the editor, bring in a file, then follow File › Export › Export as PNG….
Open the editor